ref:https://blog.miniasp.com/post/2010/09/02/Useful-tool-IIS6-Resource-Kit-Tools-and-SelfSSL
Download tools: https://download.cnet.com/Internet-Information-Services-IIS-6-0-Resource-Kit-Tools/3000-2381_4-10735391.html
Generate a Self Signed Certificate with the Correct Common Name
This step is only required if you want to get rid of the warning message displayed because the common name on the self signed certificate doesn't match the website's hostname. In order to resolve this problem, we'll need to create the self signed certificate using the same method that is used to create a self signed certificate in IIS 6.0 (with SelfSSL instead of through IIS).
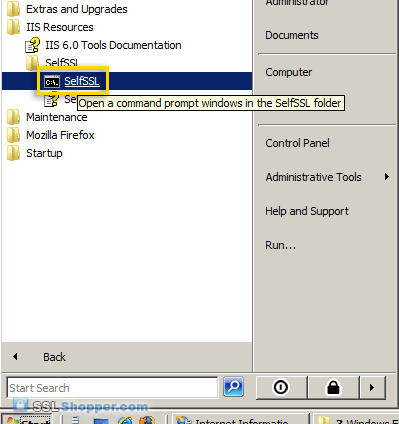
- Download the Internet Information Services (IIS) 6.0 Resource Kit Tools and install SelfSSL 1.0 (if you do a Custom install you can uncheck everything except for SelfSSL). Once it is installed, click on the Start menu, go to IIS Resources, then SelfSSL, and run SelfSSL.
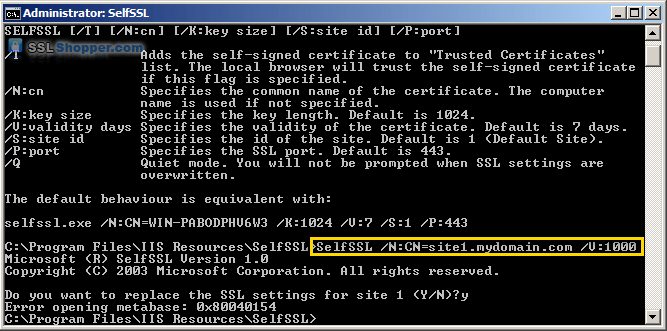
- Paste in the following command and replace site1.mydomain.com with the hostname of your IIS site. If you receive the erorr "Error opening metabase: 0x80040154", just ignore it. We will be manually binding the certificate to the website.
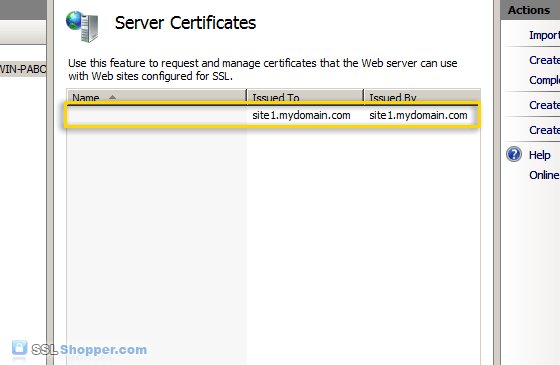
SelfSSL /N:CN=site1.mydomain.com /V:1000 - After the command is finished, you will have an IIS self signed certificate with the correct common name listed in the Server Certificates section of IIS. Now follow the instructions above to bind the certificate to your IIS website.
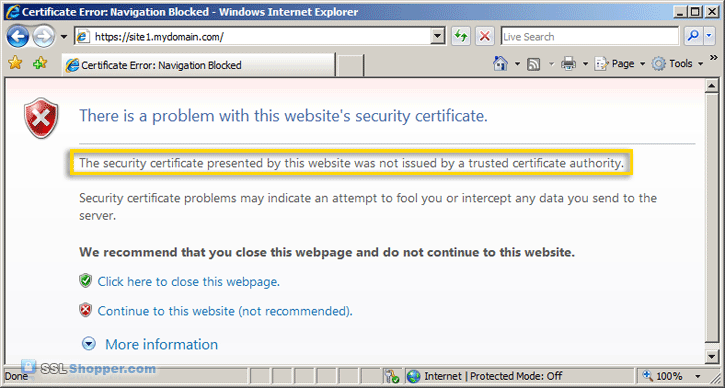
- After you have bound the new certificate to your IIS site, visit it with https in your web browser and you will encounter another error: "The security certificate presented by this website was not issued by a trusted certificate authority." (the SSL Certificate Not Trusted error) Don't worry; this is the last error we will need to fix. This is a normal error for self signed certificates because the certificate is signed by itself instead of a trusted SSL provider. All visitors to the site will see that error unless they import the self-signed certificate into their Trusted Root Certification Authorities store (or the appropriate SSL certificate store for the browser they are using). You can easily add the IIS self signed certificate to the store on the server by following the the instructions below. If you need to import the certificate on another Windows machine, just follow the instructions on how to Move or copy an SSL certificate from a Windows server.
Add the Self Signed Certificate to Trusted Root Certificate Authorities
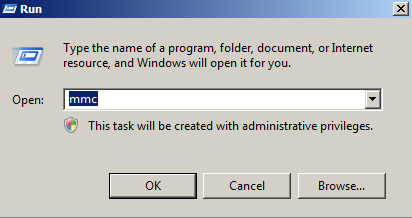
- Click on the Start menu and click Run.
- Type in mmc and click OK.
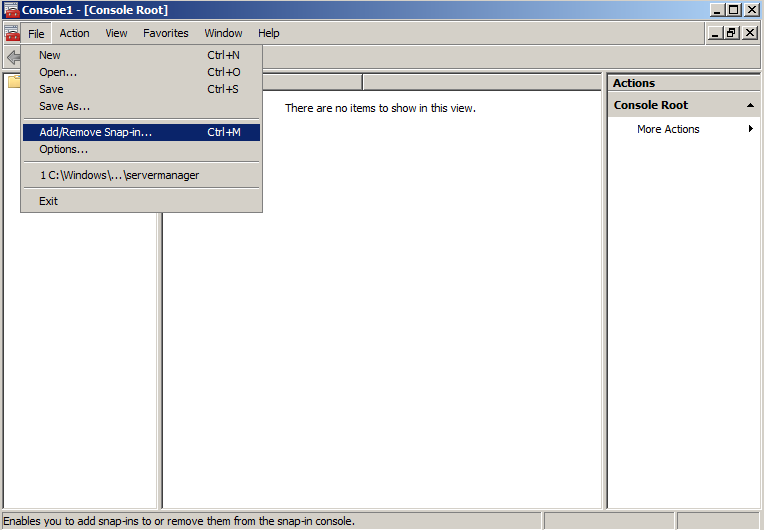
- Click on the File menu and click Add/Remove Snap-in...
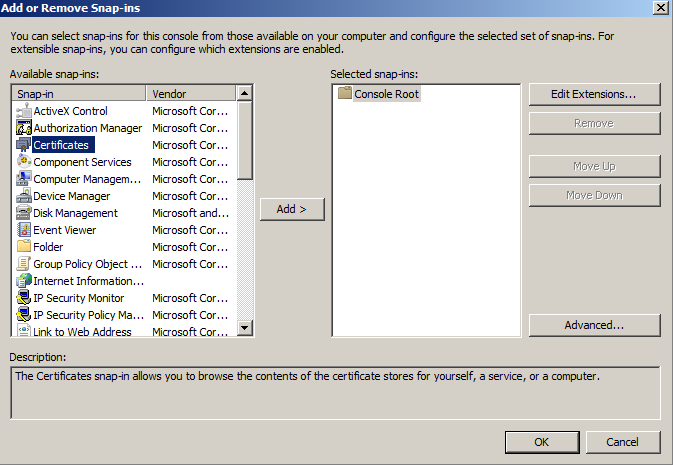
- Double-click on Certificates.
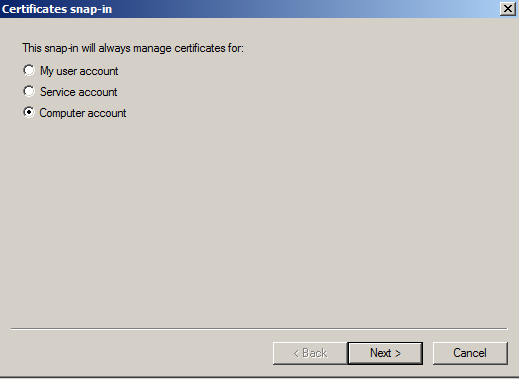
- Click on Computer Account and click Next.
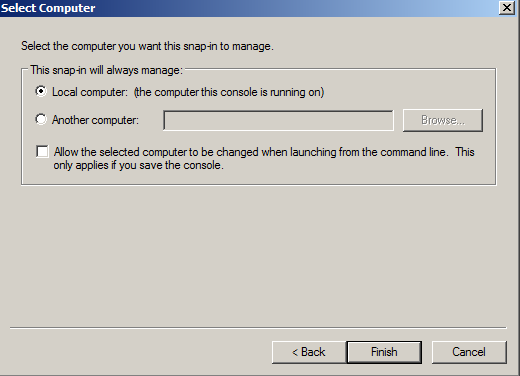
- Leave Local Computer selected and click Finish.
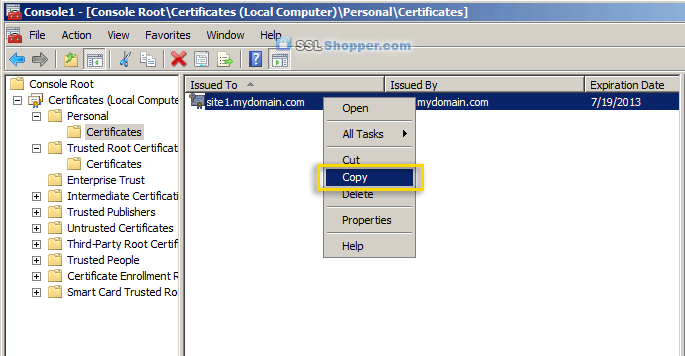
- Expand the Certificates item on the left and expand the Personal folder. Click on the Certificates folder and right-click on the self signed certificate that you just created and select Copy.
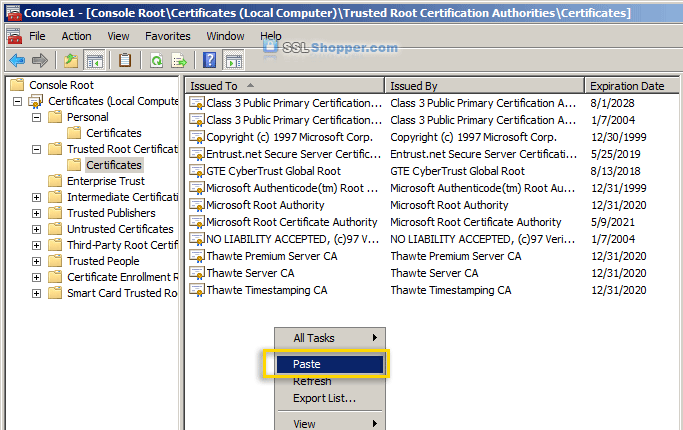
- Expand the Trusted Root Certification Authorities folder and click the Certificates folder underneath it. Right-click in the white area below the certificates and click Paste.
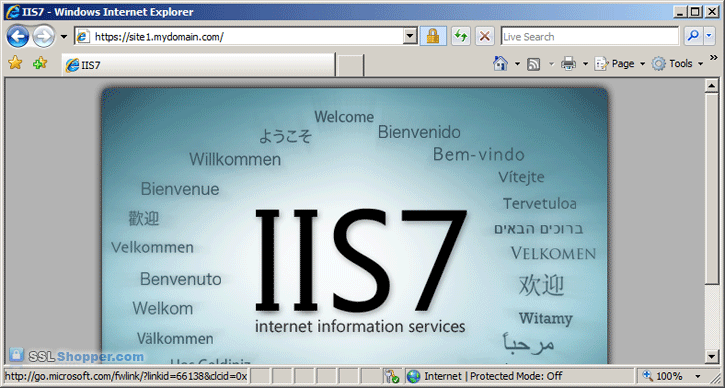
- Now you can visit your site with https in your web browser and you shouldn't receive any errors because Windows will now automatically trust your IIS self signed certificate.
介紹好用工具:IIS 6.0 Resource Kit Tools 與 SelfSSL 工具

要在 IIS 6.0 下安裝一個測試用的 SSL 憑證使用內建的工具可以說是非常麻煩的,不過 IIS 6.0 Resource Kit Tools 裡面有個 SelfSSL 工具可以非常快速且方便的幫你建立站台的 SSL 金鑰,並且直接將站台所有 SSL 相關設定都處理好,對於要進行 SSL 的安裝與測試來說非常的方便。
首先,當然是先把 IIS 6.0 Resource Kit Tools 安裝好,安裝好之後所有檔案會放在以下目錄:
C:\Program Files\IIS Resources
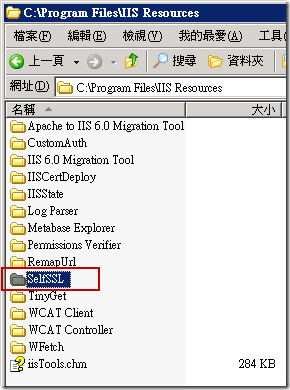
我們開啟命令提示字元並進入 SelfSSL 目錄裡輸入 SelfSSL.exe /? 查詢使用方式:
Microsoft (R) SelfSSL Version 1.0
Copyright (C) 2003 Microsoft Corporation. All rights reserved.

Installs self-signed SSL certificate into IIS.
SELFSSL [/T] [/N:cn] [/K:key size] [/S:site id] [/P:port]

/T               Adds the self-signed certificate to "Trusted Certificates"
                 list. The local browser will trust the self-signed certificate
                 if this flag is specified.
/N:cn            Specifies the common name of the certificate. The computer
                 name is used if not specified.
/K:key size      Specifies the key length. Default is 1024.
/V:validity days Specifies the validity of the certificate. Default is 7 days.
/S:site id       Specifies the id of the site. Default is 1 (Default Site).
/P:port          Specifies the SSL port. Default is 443.
/Q               Quiet mode. You will not be prompted when SSL settings are
                 overwritten.

The default behaviour is equivalent with:

selfssl.exe /N:CN=WIN2K3ENTSP2 /K:1024 /V:7 /S:1 /P:443
要使用 SelfSSL.exe 工具之前必須先找出網站的 ID ( 識別元 ),以下圖為例 SiteID 為 1662791246
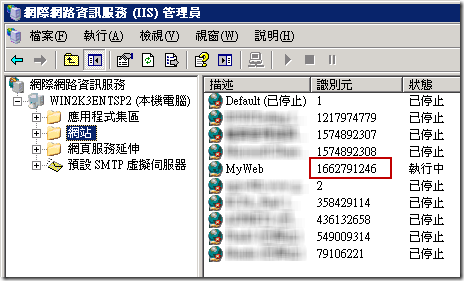
假設我們要替 SiteID = 1662791246 建立一組為期 30 天的自我簽署憑證,只要輸入以下指令即可:
selfssl.exe /S:1662791246 /V:30

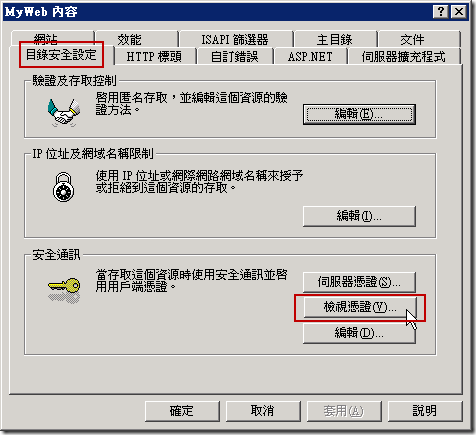
只要執行完成後所有複雜的設定就都全部完成了,你可以從站台屬性的地方切換到「目錄安全設定」的「安全通訊」區段看到「檢視憑證」按鈕,這就代表憑證已經成功安裝完成了。
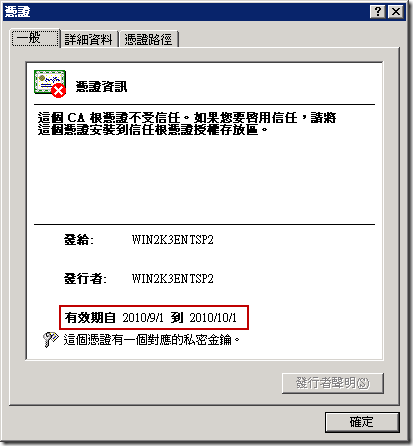
點開來看就可以看到憑證的到期日為 30 天後:
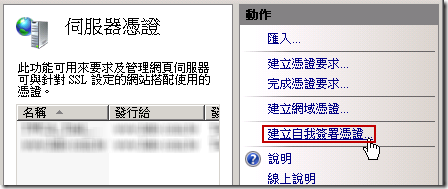
若使用 IIS7 的話,其實已經內建了「建立自我簽署憑證」的功能,所以不需要使用 SelfSSL 工具來設定
沒有留言:
張貼留言