2019年9月19日 星期四

How to Extend Office 2016 / Office 365 Trial to 180 Days

How to Extend Office 2016 / Office 365 Trial to 180 Days

Like in earlier Office versions, when installing Office 2016 or Office 365 a user is offered to try the product for free for 30 days. In 30 days some of the Office features are blocked, and a user is prompted to purchase a license and activate the product (using a retail/MAK key or a KMS activation), or to uninstall Office completely. However, there is a little trick that allows you to extend Microsoft Office free trial period to 180 days.
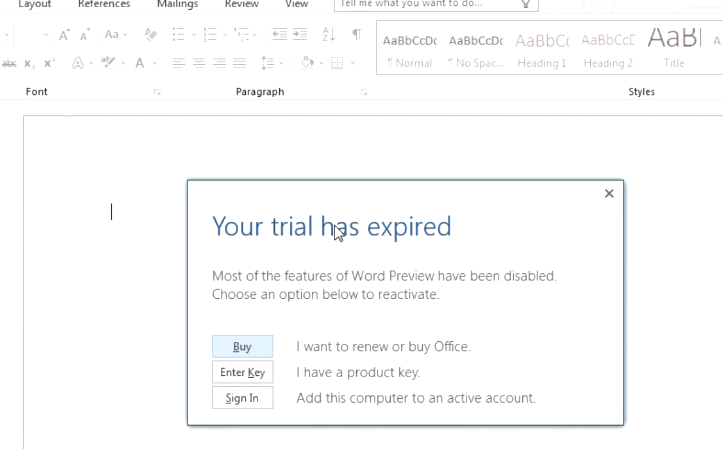
your trial has expired office 2016 / 365
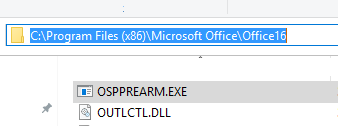
MS Office 2016 / Office 365 includes a special tool, ospprearm.exe, which is located in the directory:
  1. On 64-bit Windows versions with 32-bit Office version installed — %SystemDrive%\Program Files (x86)\Microsoft Office\Office16
  2. In other cases — %SystemDrive%\Program Files\Microsoft Office\Office16
Note. Sometimes the file may be located in:
%SystemDrive%\Program Files (x86)\Common Files\Microsoft shared\OfficeSoftwareProtectionPlatform\
Or
%SystemDrive%\Common Files\Microsoft shared\OfficeSoftwareProtectionPlatform\
ospprearm.exe - tool to extend office trial
Open the command prompt as an administrator, and run the following command to change the directory:
Cd %SystemDrive%\Program Files (x86)\Microsoft Office\Office16
To extend your trial version of Office for 30 days, run this command:
OSPPREARM.EXE
Microsoft Office rearm successful
The following message will appear: Microsoft Office rearm successful.
Thus, you rearm your Office 2016 / 365 and extend free trial to 30 days. You can run this command up to five (5) times on every 30 day of trial. Thus, you can extend the time of using the Office 2016 trial version up to 180 days (6 * 30 days). You can see the current activation status the number of days left for the grace period to end as follows.
cscript ospp.vbs /dstatus
Tip. This opportunity to extend the Office trial period is described on Microsoft website. However, it may be considered a violation of the license agreement. So you postpone the activation at your own risk.
You can rearm your Office 2010/2013 trial version in the same way.

2019年9月9日 星期一

Scrcpy 免裝 App 讓 Android 手機投影到電腦,還可電腦操控

Scrcpy 免裝 App 讓 Android 手機投影到電腦,還可電腦操控


出處: https://www.playpcesor.com/2019/08/scrcpy-app-android.html


如果你是需要進行數位工具教學的老師,或是 App 開發者、行銷人員,可能常常需要在電腦上「秀出你的手機畫面,進行 App 操作示範」,這時候,就需要一個好用的手機投影電腦工具。

我自己也有這樣的需求,所以在電腦玩物多年來做了許多的研究,在不同的機型裝備上,可能有下面幾個適用的選擇:


上面幾個工具,可以免費滿足基本的需求。

但在我自己幾番嘗試後,這一年多以來,我自己固定使用的則是後面這個付費的軟體:「AirServer 在 Windows 同時鏡像投影 iPhone iPad Android 螢幕」,因為它穩定、解析度高、可無線操作。


最近,則看到有朋友分享這款:「 Scrcpy 」,這是一款免費免安裝軟體,在 Android 上也無須安裝 App ,就能很順暢也很穩定的完成 Android 投影到電腦的任務。並且還能從電腦操作 Android 手機畫面。

我先總結自己測試「 Scrcpy 」後發現的幾點優點:

  • USB 連線投影,不需網路,非常穩定
  • 連線與反應速度都非常快
  • 免安裝 App 與軟體
  • 可從電腦用滑鼠操控手機
  • 可從電腦輸入中文內容到手機

因為是免安裝軟體,所以當我到不同學校、企業的電腦教室上課時,也可以簡單下載這個免安裝軟體,完成我需要的手機投影到電腦需求。


那麼,接下來我就快速介紹一下「 Scrcpy 」的設定流程。

在 Andorid 手機上不需要安裝任何 App ,但須要啟動開發者模式。

來到你的 Android 手機的[設定],進入[關於手機]的頁面,[連續點擊]關於頁面最下方的[版本號碼]。

當連續點擊這個版本號欄位許多次後,就會讓手機打開開發人員模式。


這時候,回到 Android 手機的設定畫面,找到[開發人員選項]。(每台 Android 手機的選單位置可能不同,我的是在[系統]頁面當中)

在[開發人員選項]中,開啟[ USB 偵錯]。


接著,用一條 USB 連接線,將手機接上你要投影的電腦, 電腦會自動安裝需要的驅動程式,在 Windows 10 或 7 我測試都可以成功。

這時候,在 Android 手機上應該會跳出[允許 USB 偵錯嗎?]的畫面,要選擇[確定],來允許這部電腦與手機連線。


接著在電腦上,到「 Scrcpy 」網站,下載和你的電腦作業系統對應的軟體。

以 Windows 電腦為例,在網站中往下捲動頁面,捲動到[ Windows ]軟體下載處,下載 32 位元或 64 位元版本。


下載到電腦後,直接解壓縮,不需要安裝,啟動資料夾中的「 Scrcpy.exe 」程式即可。

如果第一次啟動 Scrcpy 時出現失敗,沒有關係,這時候看你的手機畫面,應該會彈出需要允許信任這台電腦的視窗,點擊確認。


這樣一來,以後只要:

  • Android 手機用 USB 線連接到電腦。
  • 在電腦上啟動「 Scrcpy 」免安裝軟體。

那麼電腦上就會出現 Android 手機的投影畫面囉!

除了不需網路、穩定、速度快等優點外。

「 Scrcpy 」不只可以在電腦投影手機畫面,還可以從電腦端,用滑鼠點選的方式來操作手機上的 App 。


甚至從電腦端打字,也可以傳送到 Android 手機。

不過這邊需要一點小技巧,方法如下:

電腦端的輸入法要先切換到「英文鍵盤模式」,接著滑鼠點選 Android 手機投影畫面的 App 輸入欄位,彈出手機上的輸入法(我是用 Gboard ),這時候直接在電腦端打字,就好像敲擊手機鍵盤一樣,可以透過手機輸入法來輸入文字囉!


雖然「 Scrcpy 」有很多優點,不過我也跟自己慣用的「 AirServer 」做了比較。

這時候「 Scrcpy 」有一個明顯缺點,就是他的投影畫質比較模糊,而「 AirServer 」可以做到非常清晰的投影畫質。

下圖中,第一張圖是「 AirServer 」,第二張圖是「 Scrcpy 」,大家可以放大看原圖,實際比較看看。

我也總結一下「 AirServer 」作為對比的優缺點:

  • 電腦、手機要在同一個無線網路上,但相對的不需要連接線就能投影。
  • 反應速度會根據無線網路的速度而有差別。
  • 畫質非常清晰。
  • 需要在電腦端、手機端安裝軟體。
  • 不能從電腦操控手機。

大家可以跟前面的 「 Scrcpy 」優點做一個對比。


如果你可以順利完成基本的設定,那麼「 Scrcpy 」看起來確實是一款非常好用的 Android 投影電腦軟體。推薦給有需要的朋友試試看。

「 Scrcpy 」網站